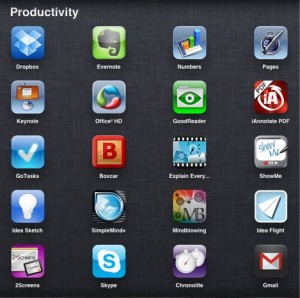
App Smashing Blog Post
I attended App Smash Up! Unlocking Student Learning with Innovative Projects.
What is App Smashing?
It is combining more than one app to produce a creative project. The presenters insisted there is no one app that will be the ideal presenting app and students often enjoy using multiple apps to create projects and presentations.
How can you get started app smashing?
Creating App Smashing Fluency:
1. Get a solid foundation of creation apps: get students/staff able to useapproximately six creation apps. Students should be able to navigate apps almost completely independently.
2. Collaborate and do a whole group project either as a staff or as a class.
3. Next, encourage smaller group projects.
4. Eventually, assign students individual projects.
Next, I will describe some apps I found to be useful tools and some examples of app smashing.
Nearpod: Nearpod is a free app for the iPad. Teachers can show a presentation to students on their individual iPads while monitoring the students for engagement. Students can interact through polls and drawn/written responses.
Students are given a code to access a presentation, then they enter their name.
Students can‘t advance in a presentation until you advance. If someone leaves a presentation (goes to another app) they will turn red in the list.
You can get automatic feedback on quiz/survey questions. You can also save the results of any activities/questions, and print them out.
You can share out students’ slides anonymously.
But remember if you share out you lock the other students’ slides.
This program can be run from a laptop to iPads, iPad to iPads etc.
Go to nearpod.com to create a presentation or you can upload already created slides from Keynote, PowerPoint orGoogle drive to nearpod.com.
If you see multiple classes of students, at the end of each session exit and if you open the session again you will have a new code. Students will be grouped by code in the second session, and you can name sessions according to which class they represent.
Example of App Smashing Project:
Informational Content Area Collage:
Apps Used: PicCollage, ThingLink, Photos, Padlet
First, create a collage in PicCollage : A free photo organizing app with borders, backgrounds and fonts. Similar format to Layout app for iPhone without the filters.
In PicCollage, you can use photos from the Photo library or photos from a web search, then save your collage to the photo library.
ThingLink: A free digital poster app with lots of possibilities.
You can create a class through the app where students can go in, edit and add links/explanations for pictures.
Upload PicCollage picture then add links or captions for the pictures. Adding captions is as easy as double tapping a picture and typing. You can link websites or videos as well.
Once you are done and it is saved in ThingLink, you can click share and click “Copy the Link” if you want to share the link, it can also be shared through email.
Padlet: A free online cork board where people can upload different presentations.
Finallypaste the ThingLink link to upload the ThingLink to the Padlet. You could have all your students upload their ThingLinks to the Padlet so that they could see their classmates‘ projects.
What are some resources for finding pictures without copyright?
Often students just go on Google Image search not realizing that most of the images are copyrighted. Here are some places where the pictures are free for the taking:
Websites:
MorgueFile.com: pictures without copyrights on the first tab
Pixabay: another website with pictures with no copyright
To get Google pictures copyright free: go to search tools and select “label for reuse” this will filter only pictures that are copyright free.
Informational Content Area Book:
Apps Used: Photos ,Book Creator or Explain Everything (not free) or Educreations
First, search for or take photos on the topic about which you want to teach.
Educreations: A free app where you can upload photos, enter text and write/draw with your finger. It will also record a short audio video/presentation. Unfortunately there is no way to prevent it from recording sound. However, I’ve found that you can just play the presentation on mute. Another issue is you cannot export the creation to another app, but you can email yourself the link. Overall, a great free app for younger students to use, simple with only a few choices for colors.
Upload the pictures to the page and you can add text, or drawing. You can hit record when you begin creating and it will pause as you add text or drawing. I would suggest allowing 1-2 seconds between adding new text or drawing and then pausing the recording in between. At the end when you play the recording it will appear like a presentation where text is revealed in steps.
Explain Everything: A $5 app that is like a better version of Educreations. You can record without sound and is more user friendly. There is also anew simple interface to use with younger students which makes it more accessible to K-12. This was the one app that everyone said was worth the purchase.
Book Creator: A free app that can create one digital book with videos, audio and pictures. On the free version, you can save it to iBooks and then go back and delete the book and create another one to get around the one book per app rule.
Overall, I enjoyed this session on App Smashing and look forward to trying out some of the projects in my own classroom!

No Responses to “App Smash Up: Creating Projects with Multiple Apps” Leave a reply ›